Setting up a lighting system can significantly transform the ambiance and functionality of any space, whether it’s a cozy home or a bustling commercial environment. If you’ve ever wondered how to get started with Lighting Systems Setup or felt overwhelmed by the myriad choices, you’re in the right place. In this comprehensive guide, we’ll walk you through the essential steps and expert tips for both Residential Lighting Systems Setup and Commercial Lighting Installation Services. From understanding different types of lighting systems and assessing your space, to incorporating Smart Home Lighting Solutions and troubleshooting common issues, we’ve got you covered. Plus, we’ll share valuable advice on selecting the right bulbs and fixtures, energy-saving techniques, and important safety precautions. Ready to brighten up your life? Let’s dive in!
Understanding Different Types of Lighting Systems
When diving into the world of Residential Lighting Systems Setup, it’s vital to understand the kinds of lighting systems available. This knowledge will not only guide your purchase choices but also impact the ambiance, mood, and functionality of your living or workspace.
1. Ambient Lighting:
Ambient, or general lighting, is the primary source of light in a room, providing overall illumination.
-
Characteristics:
- Ensures uniform light distribution
- Typically comes from ceiling-mounted fixtures like chandeliers, recessed lights, or track lights
2. Task Lighting:
Task lighting targets specific areas where activities such as reading, cooking, or working on a computer take place.
-
Features:
- Focuses on functional lighting
- Includes desk lamps, under-cabinet lights, and pendant lights
- Requires higher brightness for efficiency
3. Accent Lighting:
Accent lighting adds drama and aesthetics to a room by creating visual interest.
-
Highlights:
- Emphasizes items like artwork, plants, or architectural elements
- Utilizes wall-mounted fixtures, picture lights, or track lighting
- Usually uses adjustable fittings to focus light precisely
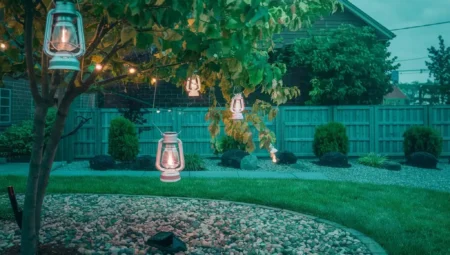
4. Decorative Lighting:
Decorative lighting primarily serves an aesthetic purpose, adding to the decor rather than lighting up the space.
-
Distinctive Features:
- Includes chandeliers, sconces, and ornamental lamps
- Often integrates with the overall design theme of the room
Understanding these basic types of lighting systems will enhance your Commercial Lighting Installation Services or your home lighting setup. To make it clearer, let’s summarize these points in a table:
| Lighting Type | Primary Purpose | Common Fixtures |
|---|---|---|
| Ambient Lighting | General Illumination | Chandeliers, Recessed Lights, Track Lights |
| Task Lighting | Function-Specific Tasks | Desk Lamps, Under-Cabinet Lights, Pendants |
| Accent Lighting | Visual Interest | Wall-Mounted Fixtures, Picture Lights |
| Decorative Lighting | Aesthetic Value | Chandeliers, Sconces, Ornamental Lamps |
Taking the time to grasp these different lighting types helps in designing efficient and attractive setups, whether you’re planning a Smart Home Lighting Solutions or a full-scale commercial installation. Equip yourself with this foundation, and you’re on your way to achieving stellar lighting design.
Essential Tools and Materials for Lighting Setup
Setting up a lighting system can be a seamless process when you have the right tools and materials at your disposal. Whether you’re embarking on a Residential Lighting Systems Setup or tackling Commercial Lighting Installation Services, being well-prepared is key to success. Below are some essential tools and materials you’ll need for a smooth setup.
Tools You’ll Need
- Circuit Tester: Ensures that your power source is correctly wired and safe.
- Wire Strippers: These are crucial for removing insulation from your wires without damaging the conductive core.
- Voltage Meter: For checking electrical flow to confirm everything is operating correctly.
- Screwdrivers: A set of flathead and Phillips screwdrivers for installing light fixtures and securing screws.
- Drill: For securing fixtures to walls and ceilings.
- Utility Knife: Useful for cutting wires or opening packages.
Materials Required
- Wires: Make sure to select wires with the right gauge for your setup.
- Electrical Tape: Essential for insulating electrical wires and connections.
- Wire Connectors: Used to secure wires safely.
- Light Fixtures: Choose aesthetically pleasing fixtures that meet your lighting needs.
- Bulbs: Selecting the right type of bulbs is crucial for achieving the desired ambiance and energy efficiency.
- Mounting Brackets: Necessary for fixing light fixtures in place.
Key Components
Here is a quick reference table highlighting key components and their uses:
| Component | Use |
|---|---|
| Circuit Tester | Check power source wiring |
| Wire Strippers | Remove insulation from wires |
| Voltage Meter | Confirm electrical flow |
| Screwdrivers | Install fixtures and secure screws |
| Drill | Secure fixtures to surfaces |
| Utility Knife | Cut wires and open packages |
| Electrical Tape | Insulate wires and connections |
| Wire Connectors | Securely join wires |
| Light Fixtures | Provide illumination and décor |
| Bulbs | Light sources; choose based on need |
| Mounting Brackets | Secure fixtures to walls and ceilings |
By gathering these tools and materials in advance, you’ll streamline the process and reduce the chances of interruption. Remember, investing in the right equipment not only enhances the quality of your Smart Home Lighting Solutions but also ensures a safer, more efficient installation process.
Lastly, always double-check your inventory before starting any lighting project to prevent delays and ensure a smooth setup experience.
Understanding these essentials will set a strong foundation for your lighting project, be it residential or commercial. Don’t underestimate the importance of having the right tools and materials to make your lighting vision come to life.
Assessing Your Space for Optimal Lighting Design
Creating an effective lighting design is more than just installing fixtures. It requires a thorough assessment of your space to ensure the system meets your needs and enhances the room’s aesthetic. Here’s how to evaluate your space for an optimal lighting setup:
Identify Key Areas
Start by mapping out the key areas in your space:
- Living Room: Evaluate seating areas, entertainment zones, and focal points.
- Office Space: Pinpoint workstations, reading spots, and areas needing task lighting.
- Outdoor Areas: Highlight pathways, patios, and entrances.
Consider Natural Light
Leverage natural light to your advantage:
- Windows: Observe the amount and direction of natural light entering through windows.
- Daylight Patterns: Note how light changes throughout the day.
- Seasonal Variations: Account for differences in light during various seasons.
Define Lighting Objectives
Establish what you want to achieve with your lighting:
- Ambient Lighting: General illumination for the entire room.
- Task Lighting: Focused light for specific tasks like reading or cooking.
- Accent Lighting: Highlight architectural features, artworks, or decor.
Evaluate Current Lighting Infrastructure
Assess the existing setup to understand what you need to change or upgrade:
- Fixture Placement: Check the positioning of current fixtures.
- Wiring and Outlets: Ensure sufficient electrical access.
- Light Levels: Measure the brightness of the existing lights in lumens.
Room Size and Layout
Consider the dimensions and layout of the space:
- Room Size: Larger rooms may need additional or more powerful lighting fixtures.
- Ceiling Height: High ceilings often benefit from chandeliers or pendant lights, while lower ceilings might be better suited for recessed or flush mount lights.
Choosing Between Residential and Commercial Needs
Different spaces have different requirements:
- Residential Lighting Systems Setup: Focus on comfort, aesthetics, and local building codes.
- Commercial Lighting Installation Services: Prioritize efficiency, uniformity, and regulatory standards.
Implement Smart Home Solutions
Incorporate advanced technologies to enhance your lighting design:
- Smart Home Lighting Solutions: Use smart bulbs and sensors to automate and optimize lighting based on room usage and preferences.
By following these steps, you can ensure your lighting design will be both functional and visually pleasing, tailored to your specific space needs. Use this as a guide to create an inviting and well-lit environment, whether for residential, commercial, or smart home applications.
Installing Basic Residential Lighting Systems
Setting up Residential Lighting Systems Setup can seem daunting, but with the right approach, it becomes manageable and rewarding. Here are some basic steps and tips to get you started.
Step-by-Step Installation Guide:
1. Plan Your Setup
Before you start, planning is crucial.
- Assess Your Needs: Determine the type and purpose of lighting in each room (e.g., ambient, task, or accent lighting).
- Layout: Sketch a rough diagram of your space, marking where lights will be installed.
2. Gather Essential Tools and Materials
Having the right tools and materials at hand saves time.
- Tools: Screwdrivers, wire strippers, voltage tester, drill.
- Materials: Light fixtures, bulbs, wiring, electrical tape.
3. Turn Off Power Supply
Safety first! Ensure you turn off the power supply at the circuit breaker to avoid electrical shock.
4. Wiring and Installing Fixtures
- Connect Wires: Match the wires from the light fixture to the wires in your wall/ceiling. Usually, black to black (live), white to white (neutral), and green or copper to the ground.
- Secure the Fixture: Once the wires are connected, secure the fixture to the ceiling or wall using screws and a mounting plate if provided.
5. Add Bulbs and Test
Install the appropriate bulbs for your fixtures. Turn the power back on and use a light switch to test the setup.
Example Table for Fixture Selection:
| Fixture Type | Recommended Use | Key Features |
|---|---|---|
| Chandeliers | Living/Dining rooms | Decorative, multiple bulbs |
| Pendant Lights | Kitchen/Islands | Focused task lighting, adjustable |
| Wall Sconces | Hallways/Bathrooms | Accent lighting, space saving |
Useful Tips:
- Energy Efficiency: Choose LED bulbs which are both energy-efficient and long-lasting.
- Style Consideration: Ensure fixtures match the room’s decor for a cohesive look.
By following these steps and tips, your Residential Lighting Systems Setup should be seamless and efficient. If the task becomes too complex, consider reaching out for Professional Lighting Installation Services.
Step-by-Step Guide to Commercial Lighting Installation
When it comes to a successful Commercial Lighting Installation Services, planning and precision are paramount. A well-executed installation not only illuminates workspaces efficiently but also enhances employee productivity and customer satisfaction. Here’s a structured guide to help you through the process:
Planning Phase
- Assess Lighting Needs: Determine the specific requirements of the commercial space. Different areas may need varying lighting intensities.
- Layout Design: Create a layout plan that considers both functionality and aesthetic appeal.
- Compliance: Check for local regulations and standards to ensure compliance with safety codes.
Tools and Materials You’ll Need
- Basic Tools: Screwdrivers, wire strippers, drills
- Safety Gear: Gloves, goggles, insulating mats
- Materials: Light fixtures, wiring, switches, control systems
Installation Steps
-
Turn Off Power:
- Ensure all power is switched off at the main circuit breaker.
- Use a voltage tester to confirm that wires are not live.
-
Mounting Fixtures:
- Attach light fixtures to the ceiling or designated areas according to your layout plan.
- Secure fixtures tightly to prevent any loosening.
-
Wiring:
- Connect the wires following the wiring diagram provided with the fixtures.
- Use wire nuts or connectors to secure the connections.
-
Install Switches and Control Systems:
- Mount switches in accessible areas.
- Integrate the setup with Smart Home Lighting Solutions if needed for automated control.
-
Testing:
- Switch the power back on and test each light fixture.
- Ensure all lights operate correctly and make adjustments if necessary.
Quick Reference Table
| Step | Action | Key Tips |
|---|---|---|
| Planning | Assess needs, design layout, check compliance | Prioritize high-traffic areas |
| Tools/Materials | Gather tools and safety gear | Prepare all items beforehand |
| Turn Off Power | Switch off at circuit breaker | Always double-check safety |
| Mount Fixtures | Attach fixtures securely | Firmly secure all fittings |
| Wiring | Connect wires as per diagram | Follow color codes strictly |
| Install Switches | Mount in easily accessible areas | Test for smooth operation |
| Testing | Verify functionality of each light | Adjust as needed |
Following these steps will ensure a smooth and effective Commercial Lighting Installation Services process. Remember, meticulous planning, correct tools, and adherence to safety can make all the difference. Subsequently, incorporating Smart Home Lighting Solutions can enhance control and efficiency.
Selecting the Right Bulbs and Fixtures
Choosing the right bulbs and fixtures is a crucial step in any Lighting Systems Setup. With an abundance of options available, making the right choice might seem daunting. However, these simple guidelines can help you illuminate your space efficiently and effectively.
Types of Bulbs
First, let’s look at the different types of bulbs available:
- Incandescent: Traditional but less energy-efficient.
- LED: Energy-efficient and long-lasting.
- CFL: Compact fluorescent lights that offer a middle ground in terms of efficiency and cost.
- Halogen: A type of incandescent that is slightly more energy-efficient and provides a brighter light.
| Bulb Type | Energy Efficiency | Cost | Lifespan |
|---|---|---|---|
| Incandescent | Low | Low | Short |
| LED | High | High | Long |
| CFL | Moderate | Moderate | Moderate |
| Halogen | Low-Moderate | Moderate | Short |
Bulb Selection Tips
When selecting bulbs, consider the following:
- Energy Efficiency: Opt for LED or CFL for long-term savings.
- Brightness: Measure in lumens, not watts. More lumens mean a brighter bulb.
- Color Temperature: Cool white for task lighting, warm white for ambiance.
Choosing Fixtures
The function and aesthetics of your space will dictate the fixtures you choose:
- Task Lighting: Best for kitchens, workspaces, and reading areas. Examples include under-cabinet lights and desk lamps.
- Ambient Lighting: Softens the overall lighting of a room, using fixtures like ceiling lights and wall sconces.
- Accent Lighting: Highlights specific features or decor. Think of track lights and picture lights.
Practical Tips for Fixture Selection
- Match the Fixture Style to Your Decor: Ensure the fixtures you choose align with the room’s design scheme.
- Consider Fixture Placement: Proper placement can enhance the room’s functionality and appearance.
- Think About Maintenance: Choose fixtures that are easy to clean and replace bulbs.
Incorporating Smart Home Lighting Solutions
Smart Home Lighting Solutions allow for added convenience and energy savings. These systems can be controlled via smartphone apps and even integrate with voice-controlled assistants like Alexa or Google Home. Consider:
- Dimmable LED Bulbs: Easily adjusted for desired brightness.
- Smart Fixtures: Enable you to change lighting settings remotely.
- Motion Sensors: Automatically turn lights on or off based on movement.
Summary
By understanding the characteristics of various bulbs and fixtures, you can make informed decisions for any Residential Lighting Systems Setup or when planning Commercial Lighting Installation Services. This approach ensures that your space is not only well-lit but also energy-efficient and visually appealing.
Incorporating Smart Home Lighting Solutions
Incorporating Smart Home Lighting Solutions into your setup can elevate your living space’s function and style. Here’s a straightforward guide to seamlessly integrate smart lighting into your environment:
Step-by-Step Guide:
-
Choose a Compatible System:
- Check Compatibility: Ensure your smart home ecosystem (Amazon Alexa, Google Home, Apple HomeKit) supports the lighting system you plan to install.
- Hub Selection: Some systems may require a dedicated hub; check if you need one.
-
Select Smart Bulbs and Fixtures:
- Smart Bulbs: Bulbs with Wi-Fi or Bluetooth capabilities are essential.
- Smart Fixtures: Consider fixtures that can change color temperature and brightness.
-
Install and Connect:
- Follow Manufacturer Instructions: Each brand will have specific steps for installation.
- App Configuration: Use the lighting system’s app to connect and control your lights.
-
Set Up Automation and Routines:
- Schedule Lighting: Automate lights to turn on/off at set times.
- Motion Sensors: Use sensors to activate lights as you enter a room.
Key Components Comparison
| Component | Example Products | Key Features |
|---|---|---|
| Smart Bulbs | Philips Hue, LIFX | Color changing, dimmable |
| Smart Switches | TP-Link Kasa, Wemo | Remote control, voice assistant |
| Hubs | Samsung SmartThings Hub | Centralized control, multiple devices |
| Motion Sensors | Ecobee, Aqara | Energy-efficient, triggers automation |
Benefits of Smart Home Lighting
- Energy Efficiency: Schedule lights to reduce energy consumption.
- Enhanced Control: Adjust lighting settings remotely through mobile apps.
- Customization: Tailor your home’s ambiance with various lighting scenes and modes.
Integration Tips:
- Layer Your Lighting: Use a combination of smart bulbs, switches, and sensors for maximum flexibility.
- Voice Control: Utilize voice commands for hands-free operation.
- Group Lights: Create groups of lights for easier control of multiple lights simultaneously.
By following these steps, you can effectively implement Residential Lighting Systems Setup that’s not only smart but also user-friendly. Whether you’re upgrading your home or workspace, integrating smart components will ensure your lighting setup is efficient and future-proof.
Energy-Saving Tips for Lighting Systems
Reducing energy consumption without compromising on lighting quality is achievable by optimizing your Residential Lighting Systems Setup and other lighting installations. Here are some practical tips to ensure energy-efficient lighting:
-
Switch to LED Bulbs: LED bulbs use up to 80% less energy than traditional incandescent bulbs and last significantly longer. Although the initial cost is higher, the savings in energy bills pay off in the long run.
-
Use Dimmer Switches: Installing dimmer switches allows you to adjust the brightness of your lights, reducing energy usage when full illumination is not necessary.
-
Integrate Motion Sensors: Motion sensors automatically turn off lights in unoccupied rooms, cutting down on wasted energy. They are particularly effective in areas like hallways, bathrooms, and garages.
-
Leverage Natural Light: Maximize the amount of natural light entering your rooms by arranging furniture to avoid blocking windows and keeping curtains open during the day. This reduces the need for artificial lighting.
-
Smart Lighting Solutions: Investing in Smart Home Lighting Solutions enables you to control your lights remotely. You can schedule lights to switch off at certain times, monitor usage, and adjust settings for optimal energy savings.
Here’s a quick reference table for further clarity:
| Energy-Saving Tip | Description |
|---|---|
| Switch to LED Bulbs | Use energy-efficient LED bulbs for longer lifespan and reduced energy costs. |
| Use Dimmer Switches | Adjust brightness levels to meet needs without wasting energy. |
| Integrate Motion Sensors | Automate light usage to prevent unnecessary energy consumption. |
| Leverage Natural Light | Utilize daylight to minimize reliance on artificial lighting. |
| Smart Lighting Solutions | Automate and control lighting systems for optimized energy usage. |
Implementing these simple yet effective strategies can significantly lower your energy bills and promote a sustainable environment while maintaining a well-lit home or office. Additionally, always consider consulting with a professional for specialized Commercial Lighting Installation Services to ensure your setup is optimized for energy efficiency.
Troubleshooting Common Lighting Setup Issues
Even the most meticulously planned Residential Lighting Systems Setup or Commercial Lighting Installation Services can occasionally encounter problems. Here are some common lighting issues and practical ways to address them.
Flickering Lights
Flickering lights are a common problem that can be both annoying and indicative of deeper issues. Here’s how to troubleshoot:
- Loose Bulbs: Ensure that all bulbs are screwed in tightly.
- Faulty Switches: Test the switch to see if the flickering stops when wiggling it. If so, replace the switch.
- Voltage Fluctuations: Consult an electrician to check for unstable voltage within your electrical system.
Poor Light Output
If your lighting feels dim, especially after a fresh installation, consider these factors:
- Incorrect Bulb Type: Verify that you’re using the right kind of bulb for your fixture.
- Wattage Compatibility: Ensure the bulb wattage matches what the fixture is designed to handle.
- Dirty Fixtures: Clean your light fixtures regularly; dust and grime can significantly reduce light intensity.
Overheating Bulbs
Overheating bulbs can be hazardous and shorten the lifespan of the bulbs:
- Ventilation: Make sure the fixture has enough ventilation.
- Correct Bulb Wattage: Avoid using bulbs with higher wattage than recommended.
- Regular Inspections: Frequently check for signs of overheating, such as scorch marks around the fixture.
Buzzing or Humming Noises
Buzzing lights often indicate electrical issues that need to be addressed:
- Loose Connections: Tighten any loose electrical connections.
- Dimmer Switches Compatibility: Ensure your dimmer switch is compatible with the bulb type you’re using.
- Grounding Issues: Proper grounding is essential; if you suspect grounding problems, consult a professional.
Smart Light Issues
When incorporating Smart Home Lighting Solutions, you might encounter connectivity issues:
- Wi-Fi Signal: Ensure a strong and stable Wi-Fi connection.
- Software Updates: Keep your smart lighting apps and devices updated.
- Reset Devices: Sometimes, resetting the device can resolve connectivity woes.
Quick Troubleshooting Guide
For quick reference, here’s a table summarizing common issues and their quick fixes:
| Issue | Quick Fix |
|---|---|
| Flickering Lights | Tighten bulbs, check switches, consult an electrician |
| Poor Light Output | Confirm bulb type and wattage, clean fixtures |
| Overheating Bulbs | Ensure ventilation, use correct wattage bulbs |
| Buzzing Noises | Tighten connections, check dimmer compatibility |
| Smart Light Issues | Check Wi-Fi, update software, reset devices |
Navigating these troubleshooting steps can ensure your Lighting Systems Setup operates smoothly and efficiently. If problems persist, don’t hesitate to consult a professional to avoid further complications.
Safety Precautions for Lighting Installation
Ensuring safety during lighting systems setup is crucial to prevent accidents and guarantee a smooth installation process. Whether you’re working on Residential Lighting Systems Setup or engaging in Commercial Lighting Installation Services, following the right safety precautions is non-negotiable. Here’s a brief guide to help you keep your setup process safe:
Key Safety Precautions
-
Turn Off the Power:
- Always switch off the main power supply before starting any installation.
- Use a voltage tester to confirm that the circuit is not live.
-
Use the Right Tools:
- Use insulated tools designed for electrical work to avoid shocks.
- Ensure that you have all the necessary tools on hand before you begin.
-
Correct Handling of Fixtures and Bulbs:
- Handle fixtures with care to avoid breakage and potential injury.
- When installing bulbs, avoid overtightening as this can damage sockets.
-
Follow Manufacturer Instructions:
- Strictly adhere to the instructions provided by the manufacturer.
- Incorrect installation can result in equipment malfunction or hazards.
Safety Gear
- Wear Gloves: Protect your hands from cuts and electrical shocks.
- Safety Goggles: Prevent debris or small particles from injuring your eyes.
- Non-Slip Footwear: Ensure stability when working on ladders or elevated areas.
Common Electrical Safety Tips
| Precaution | Description |
|---|---|
| Use Ground Fault Protectors | Ground Fault Circuit Interrupters (GFCIs) can prevent electric shocks in wet areas. |
| Avoid Overloading Circuits | Distribute the electrical load to prevent overheating and potential fires. |
| Inspect Wires and Cables | Check for frayed or damaged wires and replace them immediately. |
Implementing these safety measures not only protects you but also ensures the longevity and efficiency of your installation. Remember to incorporate Smart Home Lighting Solutions with care, as they often require additional electrical connections and settings.
By following these detailed tips, you are setting a solid foundation for a safe and effective lighting installation process. Always prioritize safety, and don’t hesitate to seek professional help if unsure.
Maintenance Tips to Prolong the Life of Your Lighting
When it comes to ensuring the longevity of your lighting setup, regular maintenance is crucial. Whether you are dealing with Residential Lighting Systems Setup, Commercial Lighting Installation Services, or Smart Home Lighting Solutions, these tips will help you keep your lights functioning efficiently.
Regular Cleaning
Dust and debris can accumulate on light fixtures and bulbs, leading to reduced light output and overheating. Follow these steps for cleaning:
- Turn off power: Always ensure the power is off before cleaning any fixtures or bulbs to prevent electrical shock.
- Use a soft cloth: Gently wipe bulbs and fixtures with a soft, dry cloth.
- Vacuum or dust: For hard-to-reach areas, use a vacuum with a soft brush attachment or a long-handled duster.
Timely Replacement of Bulbs
Burnt-out or flickering bulbs can strain the system and reduce overall lifespan. Replace faulty bulbs with appropriate types as soon as possible. Here’s a quick reference table for bulb replacement:
| Bulb Type | Average Lifespan | Replacement Indicator |
|---|---|---|
| LED | 15,000 – 50,000 hours | Significant dimming or flickering |
| CFL | 8,000 – 10,000 hours | Frequent on/off cycling issue or burn-out |
| Incandescent | 1,000 – 2,000 hours | Complete burn-out, usually after short usage duration |
Inspect Wiring and Connections
Periodically check wiring and connections to ensure they are secure and free from damage.
- Loose wires: Tighten any loose connections to avoid electrical problems.
- Frayed wires: Replace immediately to prevent shorts or fire hazards.
Use Appropriate Wattage
Using bulbs with incorrect wattage can cause overheating and shorten fixture life. Always check the fixture label for the recommended wattage.
Smart Lighting Apps for Monitoring
If you have Smart Home Lighting Solutions, utilize companion apps to monitor and receive notifications on the status of your lights.
Professional Inspection
For more complex systems, consider annual inspections by professionals, especially if you are employing Commercial Lighting Installation Services. They can identify issues that might not be apparent and perform necessary repairs or upgrades.
By implementing these maintenance tips, you can significantly extend the lifespan of your lighting system, ensuring your space remains well-lit and energy-efficient.
Hiring Professional Lighting Installation Services
When it comes to Residential Lighting Systems Setup and Commercial Lighting Installation Services, hiring professionals can save you time, effort, and potential headaches. Here’s how to choose the right service provider to ensure your project runs smoothly.
Benefits of Hiring Professional Services
- Expertise and Experience: Professional installers have the necessary skills and experience to handle complex setups efficiently.
- Quality Workmanship: They use high-quality materials and precise techniques to ensure long-lasting and safe installations.
- Time-Saving: Professionals complete the job faster than if you were to attempt it yourself.
- Warranty and Service: Many pros offer warranties on their work, providing you peace of mind.
Key Considerations
When hiring professionals for Smart Home Lighting Solutions or other projects, consider the following:
-
Licensing and Certification:
- Verify that the service provider is licensed and certified in your area.
-
Reputation:
- Research online reviews and ask for references.
- Consider word-of-mouth recommendations.
-
Cost:
- Obtain several quotes and compare them.
- Look for detailed breakdowns to understand what you are paying for.
Comparison Table for Choosing a Service Provider
| Criteria | Professional A | Professional B | Professional C |
|---|---|---|---|
| Years of Experience | 10 | 8 | 15 |
| Customer Reviews | ★★★★★ | ★★★★☆ | ★★☆☆☆ |
| Warranty Provided | 2 years | 1 year | No warranty |
| License and Certification | Yes | Yes | No |
| Price (Estimate) | $500 | $450 | $600 |
Interview Questions to Ask
- Can you provide references or examples of your previous work?
- What is included in your service fee?
- What is your timeline for completing the installation?
- Do you offer maintenance services post-installation?
Final Tips
- Schedule a consultation: Many professionals offer a free initial consultation.
- Check for insurance: Ensure they have liability insurance to cover any potential damages.
- Discuss after-care: Confirm they provide the needed support for future adjustments or repairs.
Hiring the right professionals for your lighting installation can make all the difference in achieving a perfectly illuminated space, whether for your home or business.
Frequently Asked Questions
What are the basic components needed for a lighting system setup?
To set up a basic lighting system, you’ll need several key components: light fixtures, bulbs, switches, dimmers, and wiring. Depending on the complexity of your setup, you might also require additional elements like smart lighting controllers, sensors, or specialized mounting hardware. Remember to also have the necessary tools on hand, such as a screwdriver, wire strippers, and a voltage tester.
How do I choose the right type of light bulb for my setup?
Choosing the right light bulb depends on several factors, including the intended use of the space, the desired ambiance, energy efficiency, and budget. Common types include incandescent, halogen, fluorescent, and LED bulbs. LEDs are generally recommended for most applications because they offer excellent energy efficiency, longevity, and a range of color temperatures. It’s also vital to check the lumens (brightness) and Kelvin (color temperature) ratings to match your specific needs.
What should I consider when planning the placement of light fixtures?
When planning the placement of light fixtures, consider factors like the function of the space, natural light sources, and any focal points you want to highlight. For instance, in a kitchen, you might prioritize task lighting over the counters, while in a living room, a mix of ambient, task, and accent lighting could be ideal. Pay attention to spacing to ensure even illumination and avoid shadows or glare. Consulting a lighting layout plan can also be beneficial.
How can I make my lighting system energy-efficient?
To make your lighting system more energy-efficient, consider using LED bulbs, which consume significantly less power than traditional incandescent bulbs. Installing dimmers allows you to adjust the lighting intensity based on need, potentially saving energy. Additionally, using motion sensors and timers can ensure lights are only on when necessary. Smart lighting systems also offer the ability to control fixtures remotely and can automate schedules to optimize energy savings.